Sunday, March 8, 2015

Make Your Own Yarn Balls ("Yarnies") for Some Explosive River Steelhead Action

"Yarnie" Making Fun!


By Steve Watson
 
Yarn eggs, also known as yarn balls or affectionately referred to as "yarnies," are simple and inexpensive to make at home.  Designing, shaping, and tying them yourself can also be a fun diversion to keep the youngsters busy on dreary winter evening while they spend time with good ol' dad. 
 
Yarn balls have earned a well-deserved reputation as one of the most consistently deadly steelhead lures out there.  They are a particularly effective offering for drift-fishing from the bank and side-drifting from a boat. Yarnies offer several advantages over other baits such as fresh roe:
  • Less mess. No cleaning sticky salmon egg juice and smelly roe goo off your fingers.
  • More durable. Yarnies are very resilient and can be reused repeatedly.  Less time re-baiting your hook means more time with your line in the water actually catching fish.
  • Yarnies are more-or-less neutrally buoyant which enables them to drift along with the current in a more natural fashion.
  • They are soft, feel natural, and the yarn's fiber tends to catch in a steelhead's teeth (which actually have tiny little barbs at the end) when they chomp down on your offering. This makes it difficult for the fish to easily spit out your bait or lure, affording the angler an extra moment to set their hook. 
  • Yarn balls add attractive color, texture and visibility to your offering. 
  • Yarn has a sponge-like quality that easily soaks up and retains any scents (such as Pautzke's Nectar, Mike's Lunker Lotion, or Pro Cure Salmon Egg gel) you might wish to add as an extra attractant.
  • They are very versatile and can be added to other baits and lures (such as fresh roe, a corky, or Spin-N-Glo).
Yarnies can be made in practically any size and color combination you desire.  When targeting the anadramous missiles commonly known as steelhead, various shades of pink and orange are go-to colors with maybe some white, chartreuse, peach, or red added into the mix.  One should experiment with various size and color combinations to find what works based on the unique conditions of your local rivers and the changing moods of the fish.
 
My 10-year-old son, Aidan, and I both caught big "steelies" this year on Humboldt County's Mad River using yarnies (that we tied ourselves) after drifting roe failed.  This experience made a believer in handcrafted yarn balls out of me. 
 
Okay, now that I've convinced you to give yarnies a try, let go through our required materials list followed by a simple step-by-step method for making them. 
 
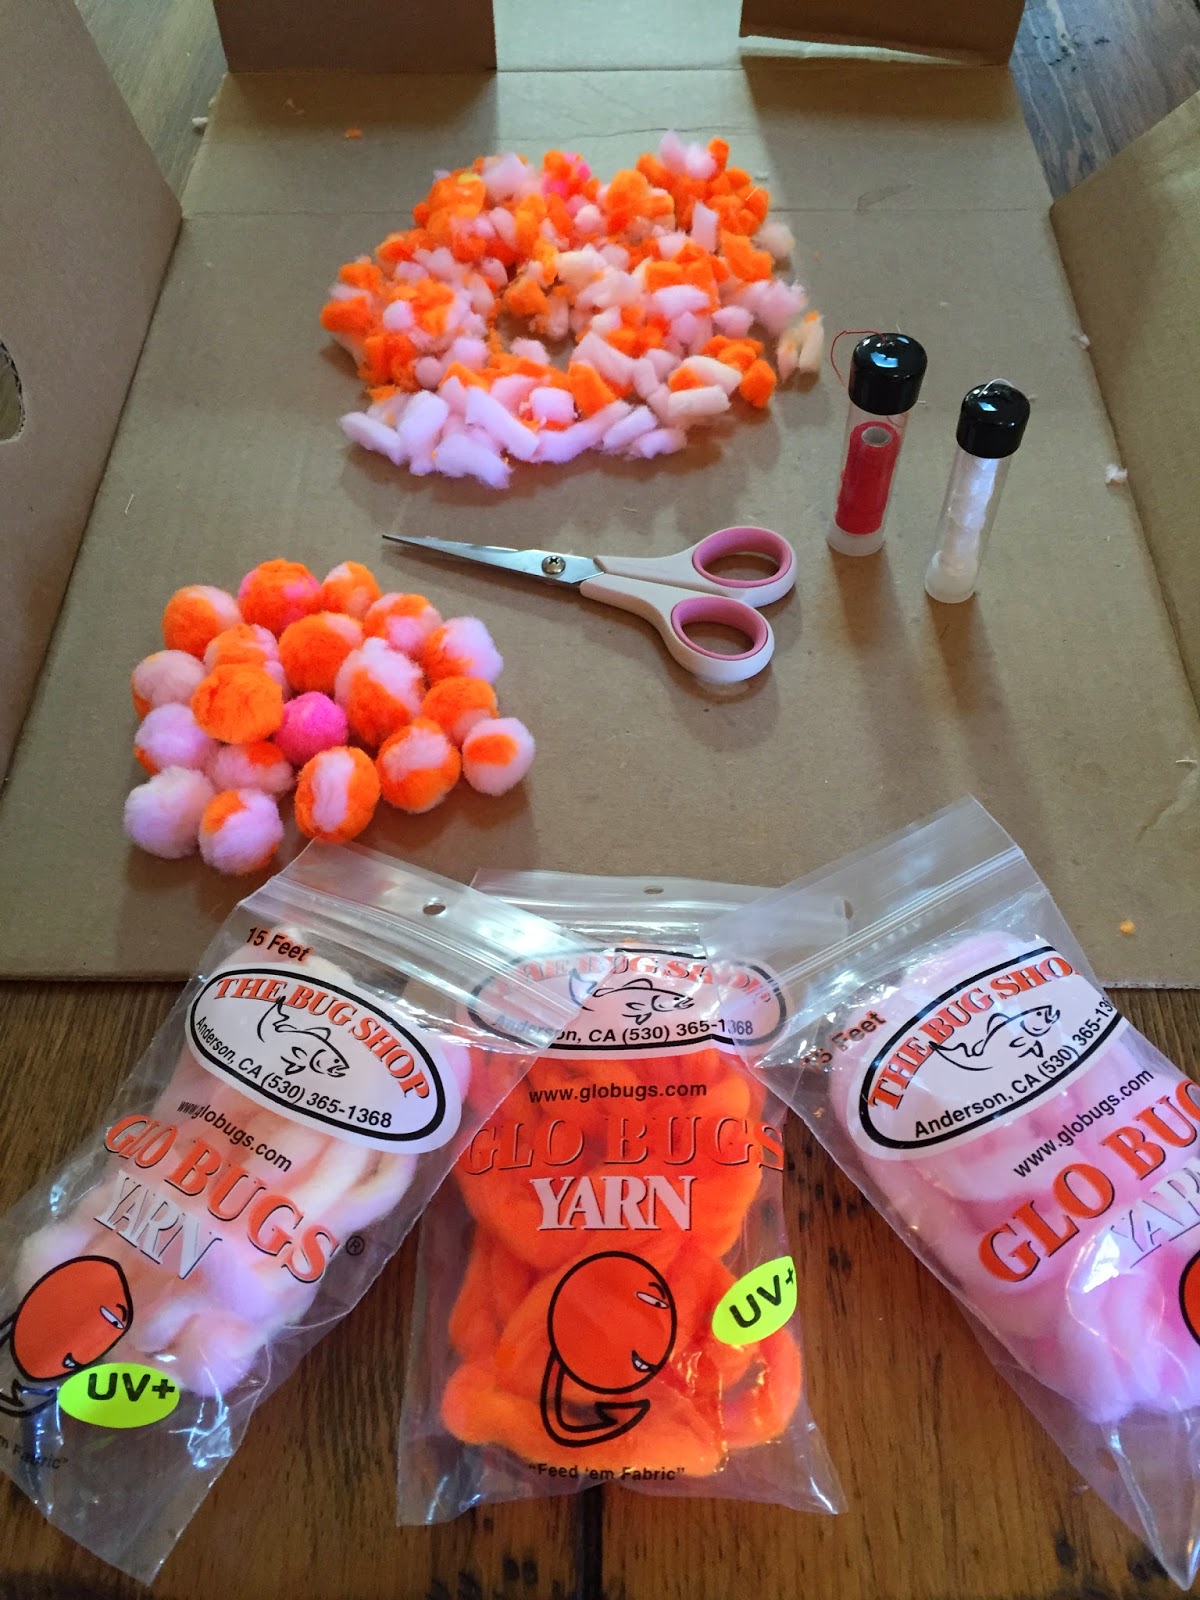
Materials and Supplies
 
Yarn
 
The two yarn manufacturers whose products are most commonly found in my local shops are Glo Bug Yarn (by the Anderson, CA-based Bug Shop) and Steelhead Stalkers. Both produce UV fishing yarn in multiple colors.  While similar, Steelhead Stalkers' yarn is thicker and fluffier than the Glo Bug offering requiring less strands to fashion a yarn ball.  While they can be intermixed, I'd choose a brand to start with and purchase several packages of their yarn in different colors such as pink, orange, and white.  
 
Thread
 
Grab a roll of Atlas Mike's Miracle Thread, which is elastic, adheres to itself, and doesn't require knotting.
 
Scissors
 
You'll need a pair of sharp, compact scissors suitable for trimming yarn.
 
Tubing
 
Though not necessary, a short piece of 3/8" PEX (or similar) tubing can help make the process easier.  (To use this tool, lay out five or so strands of Glo Bug yarn in your desired color combination. Insert a doubled-over length of heavier test fishing line through the tube, grab the head of your yarn cluster in the loop, and pull the strands back through the opposite end of the tubing. This extra step helps you to keep all the ends of the yarn strands more even and minimize wasted material). 
 
Tying a Yarn Ball
 
Start by selecting your yarn color combination, then cut off 5-6 strands 1 to 2 inches long. The strands should all be the same length.  If using Steelhead Stalkers' yarn, only 2-3 strands are necessary as it is much thicker than the Glo Bug product. 
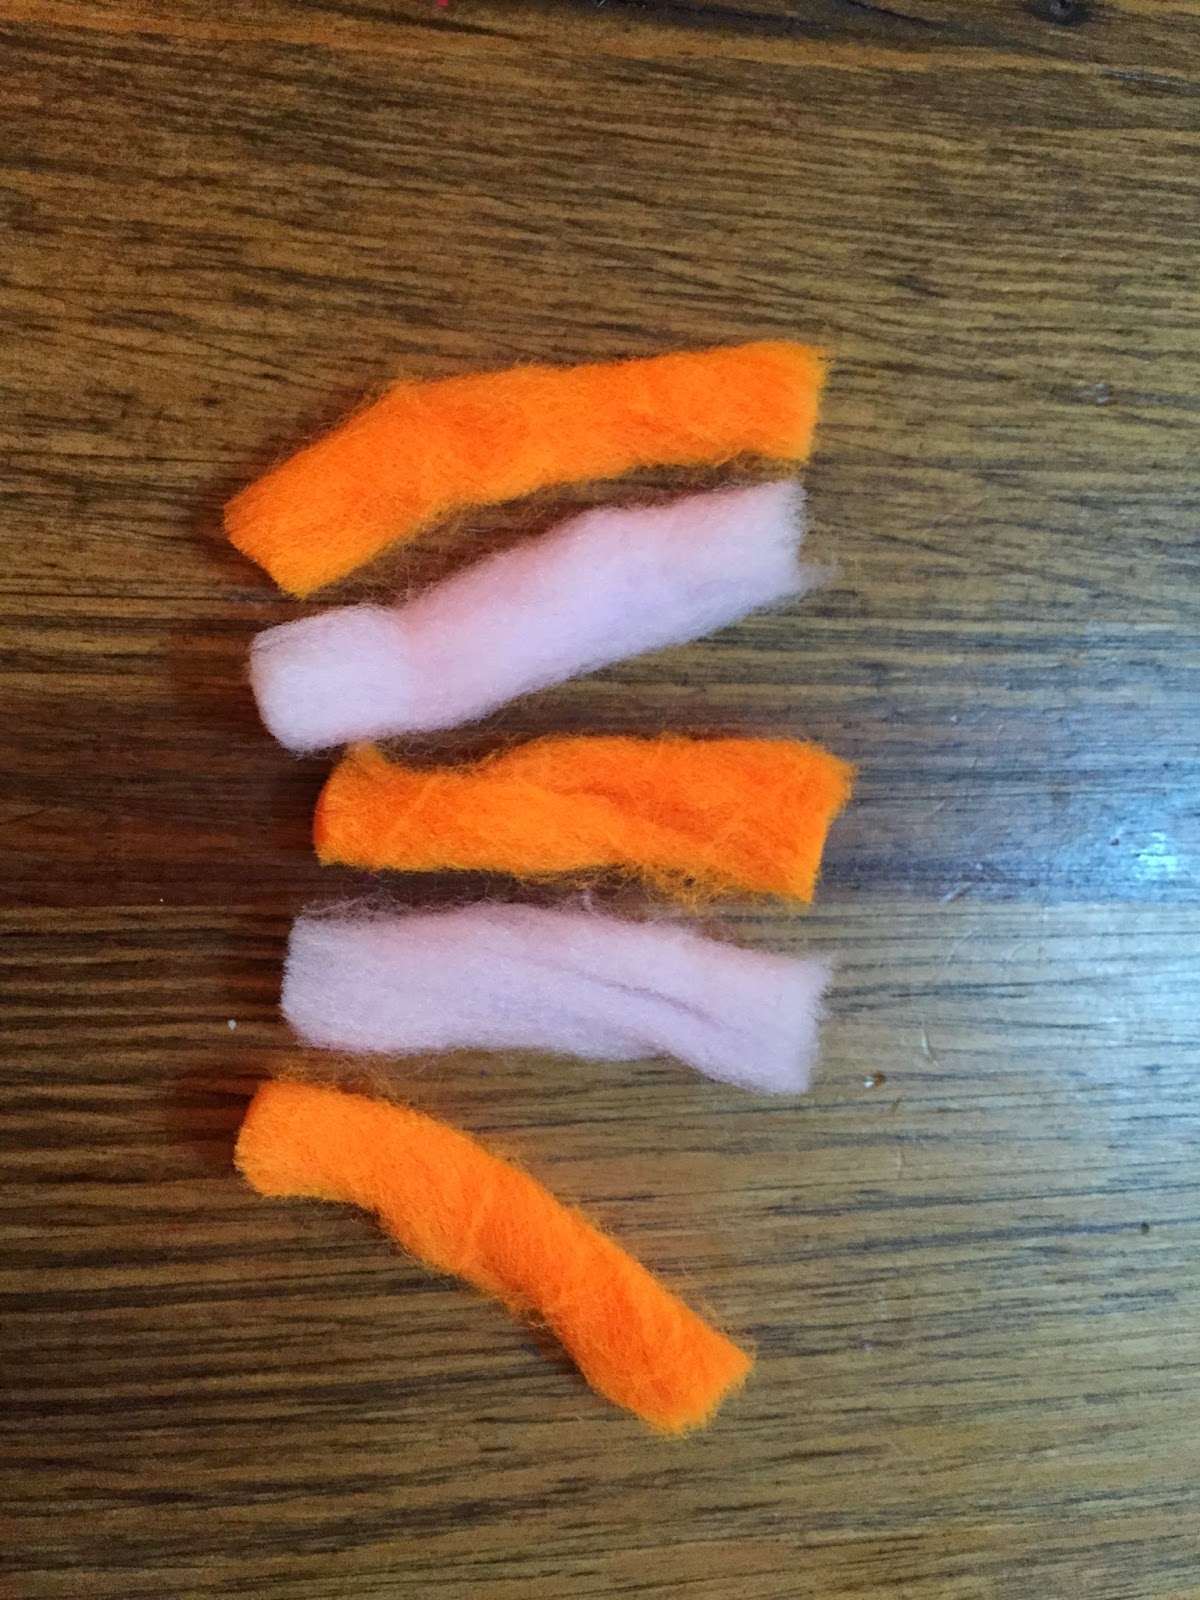
Cut 5-6 short strands of equal length.

After cutting your yarn sections, stack them together and even up the ends.  Next, pinch the yarn stack together between your thumb and forefinger. Take your Miracle Thread dispenser and make 10 very tight overlapping wraps around the middle of the yarn.  Break the tag end off.
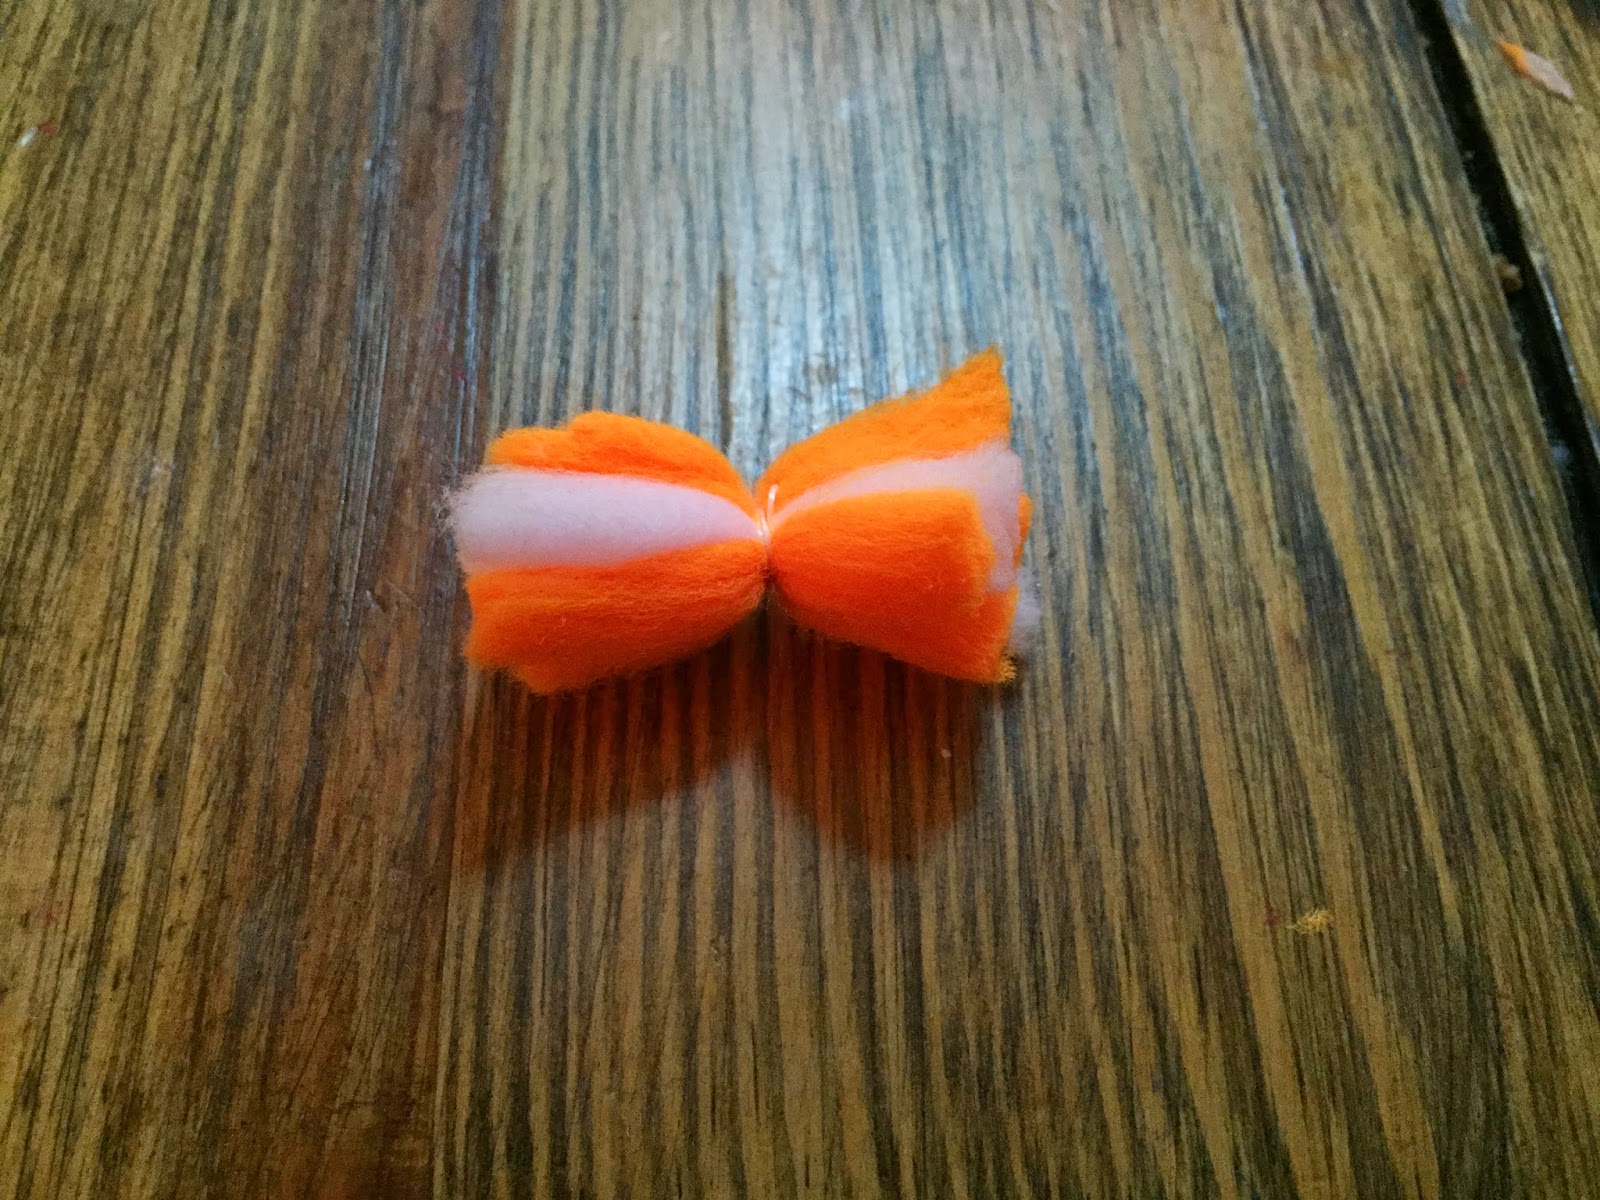

Your yarn strands should now look like this.

Fold the stack of strands in half so that the 10 ends are together.  Pinch the doubled-over strands tightly between your thumb and finger at the bend and make sure the tips are aligned. Now, using your thumb as a rough guide, trim the exposed ends in a half-circle. 

A "2D" Yarnie--we're almost there!
Fluff your new yarnie into a symmetrical ball by pulling on the strands and gently rolling it around in your palms.  Touch up any uneven sections by carefully trimming the protruding fibers. 

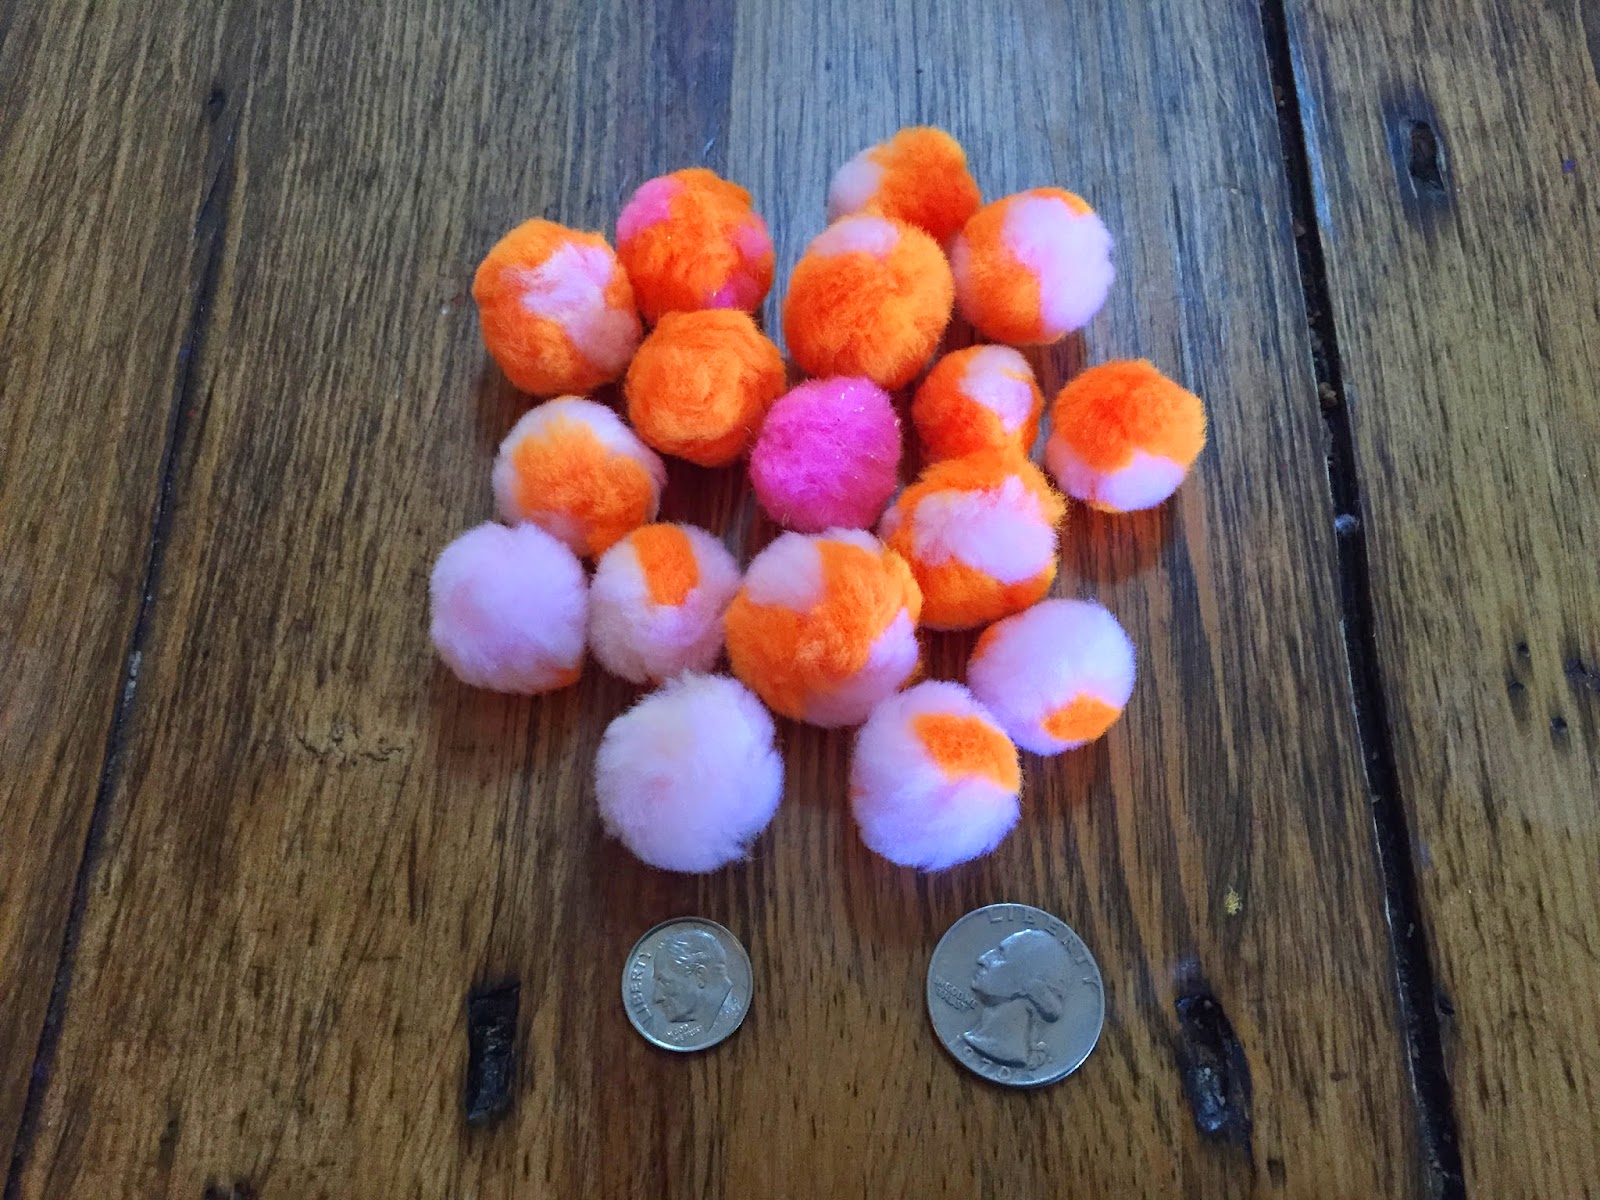
A completed "yarnie!"

Drift Fishing Set-up

By drifting or bouncing your new yarn egg approximately 1-2 feet off the river bottom, you are presenting a very attractive offering right in a "steelie's" face.  A yarnie drift fishing rig might be set up like this:
  1. Slide a snap swivel over the end of your 10-15 pound test main line then tie on a barrel swivel.
  2. Attach one end of a 16" - 4' long (depending on water conditions) eight-pound test leader to the barrel swivel.  Tie a #2 (high/big water) to #4 (small water/clear conditions) hook with a bait loop to the end of your leader.  Remember to follow your local fishing regulations which may require a barbless hook for some species in certain waterways. 
  3. Attach a "slinky" weight to the small snap-swivel.  The size of your weight will depend on the water and current conditions.  The key consideration is for your weight to bounce or skip along the river bottom with the current flow so that your bait is presented naturally and at the proper depth. 
  4. Slide your yarnie onto the hook through its center and snug it up to the hook eye. Put a fish pill on the hook behind the yarnie to help it float off the bottom.  Alternately, slide a corky or Spin-N-Glo onto the leader above the hook.  When not adding roe or shrimp to the offering, I also like to tighten the bait loop around the yarn ball to help keep it in place.  Some anglers prefer to slide their yarnie onto the leader before the hook using a worm threader tool, then add a fish pill onto the hook just below the eye for extra buoyancy. 
  5. Cast at about a 45-degree angle upstream and let the yarnie drift naturally downstream past your location. "Seams" in the river are a good place to start, as well as holding waters just above or to the side of stretches of very fast water (chutes).  Holding water is generally 3-6 feet deep and flows about as fast as your normal walking speed. 
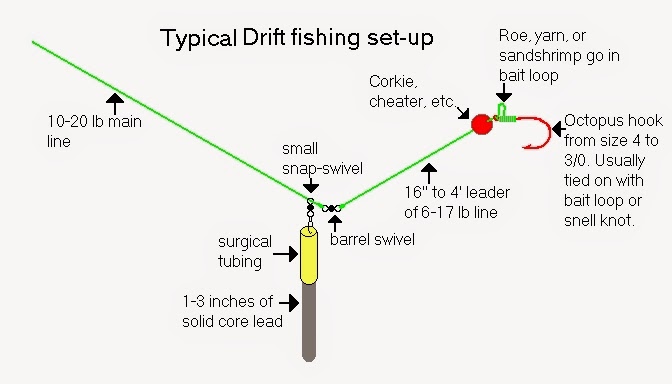
Image courtesy of http://www.steelheader.net/steelhead/driftfishing.htm


Monday, February 9, 2015

Steelhead Duo!!

Early this February (2015), Aidan and I decided to try our hand at a relatively new (to us) adventure--steelhead fishing. We chose to fish the Mad River somewhere east of Highway 101.  About 3 hours into our second outing, we hooked into a nice 7-8 pound, 28" hatchery steelhead.  After a spirited fight lasting a few minutes, Aidan successfully landed the fish (a hen filled with roe).  Aidan's big grin says it all!


The Mad River is found in upper Northern California where it flows for 113 miles through Trinity and Humboldt Counties before draining into the Pacific Ocean north of Arcata.  The Mad River Hatchery is located east of the small hamlet of Blue Lake.  Wild/native steelhead may only be caught and released, but anglers are currently allowed to keep two hatchery steelhead (easily identified by their clipped adipose fins).  Barbless hooks are required.  The steelhead in this river average around 8-12 pounds I've been told though bigger fish are caught. 
 
Aidan and I returned to our favored fishing spot about a week later.  I hooked a big, silver (fresh) native steelhead about an hour into our excursion (using a hand tied yarn ball).  This one was much larger than the one Aidan landed. I estimated its weight at well over 10 pounds.  It fought me for a good 30 minutes (on 8 lb. test line) before I was finally able to land the beauty. After a quick photo, I released it back into the river.  I've caught fish from Loreto, Mexico to southern Alaska but this may have been my most cherished catch. 


Riley's First Buck!!!

This year my primary blacktail deer hunting focus has been a quest to get my 12 and 13 year old sons their first bucks...not an easy task for public land hunting in Northern California. I took a week off of work for an opening weekend hunting trip with my 12 year old, Caleb. We had a great bonding time, some fun adventures, but alas no opportunities for a legal buck.

Accompanied by my 10 year old son Aidan a couple of weeks later, I harvested a little forked horn buck. This was a special experience to share with my younger son but I was also a little disappointed one of my older ones wasn't there to take advantage of the opportunity to shoot their first buck.

I'd made plans for a 4-day season finale hunt with my oldest son, Riley (13), for this weekend. We were set to stay at a cabin on a close family friend's private property in Mendocino County. However, a work issue arose unexpectedly this Monday and I had to cancel our plans. I woke up late Thursday morning to find it was raining hard. A storm with substantial rainfall was forecast for the next couple of days so I spontaneously decided to take one of my older boys on a day hunt out in the mountains about two hours from our coastal home.  Caleb graciously deferred to his older brother, so Riley and I left town around 9:00 am.

It started raining so hard I thought more than once about turning around and heading back home for the comfort of a good book by a warm fire in my den. To make matters more interesting, I discovered to my great chagrin that my windshield was leaking. Water was literally running down the inside of the windshield and dripping through the dash onto the driver's floorboard.  One can't shoot a buck from your couch though (at least not in my neighborhood) so we pressed on.

When we hit our general hunting area, we immediately found the heavy, persistent rain had the deer up and moving outside their normal daytime pattern. We spotted 4 spikes and numerous does within a relatively small area. At about 1:45 pm, we were traveling along a graveled forrest service road when we spotted 3 deer in the trees about 25 yards in front of and above us. One was a doe and another a tall spike buck. I stopped to glass the 3rd one and immediately saw he was a nice, plump 2x2 forked horn buck.

I told Riley, "It's a buck!" and to shoot it. As he moved into position and chambered a round, the deer walked further up the hill into the woods. I stood still, watching as Riley took over. My job was done and now it was up to him as he followed alone after the deer. My heart was pounding as I saw Riley throw the rifle to his shoulder a short time later, steady himself, aim and fire. He assessed his first shot and took a second. For a moment I was worried he might have missed as he was shooting at a moving buck in timber in the pouring rain.

My worry changed to elation as Riley turned toward me and excitedly exclaimed, "I got him!" I ran forward and arrived by his side just in time to see the buck expire behind a tree about 35 yards further up the hill from our location.

I could not be prouder of my son or more thrilled to have shared this amazing experience with him. I unexpectedly lost my own father, Mark, a year ago this November. Two weeks before he died, dad took me on an elk hunt that I will fondly remember and cherish forever. My father took me into the the woods each fall to go buck hunting. He taught me how to safely and competently use firearms, navigate the woods, and hunt for game. My dad imparted in me a great passion and respect for all things outdoors--hunting, fishing, camping etc. and I am committed to passing this legacy on to my children and grandchildren too.

 My son's first little buck might not be a monster for the record books, but it will always be a world class trophy in both of our hearts.


Father-Son First Turkey Tandem

Caleb and I went wild turkey hunting this past fall (November 2014) in Trinity County. Being newbie turkey stalkers, we'd been unsuccessful during the spring season but had such a great time we became hooked. 

Note: During California's fall wild turkey season, you can harvest both toms (males) and hens (females) unlike in the spring when only bearded birds are legal.

Caleb and I were heading to our hunting area where we were planning to set up a blind and try to call in some birds.  Shortly after entering a small valley, I spotted a gang of turkeys feeding in a sloped meadow off to our right. (Yes, the proper term for a group of turkeys is a "gang" or a "rafter." Fortunately we were armed and prepared to defend ourselves... :-).  I handed my son his Remington 870 youth model 20 gauge and told him to try to stalk closer while using a large bush to conceal his movements.  My job was done and I could only watch and hope I'd trained him well enough to get it done.

Caleb crept about 50 feet closer to the turkeys using the bush as concealment as far as he could. I thought he was waiting too long as the turkeys were picking up speed as they began to move away. Caleb later told me he had to wait for a clear shot so he didn't inadvertently hit more than one bird.  I saw him take the shot at about 25-30 yards and watched a hen go down. He yelled, "I got one." I hurried up to Caleb and he handed me the shotgun. I then took off up the hill to the right where I'd seen two of the turkeys go after branching off from the rest of the gang. I was able to take a clean shot from about 40 yards at the trailing hen. The hen went down and in a space of under a minute we had each harvested our ever first wild turkeys!  It was an amazing experience to share with my son...something we will both remember and cherish for a lifetime.


Sunday, February 8, 2015

Fall Buck Hunting with Caleb

I took my 12-year-old son Caleb on week-long blacktail deer hunting trip following opening weekend this past September (2014).  While Caleb didn't get a shot at a buck this year, we had an great time together riding the back trails on our Honda ATV at the "ranch", exploring "Rat Trap Gap", meeting new friends (thanks for the adventure and hospitality Bob), and enjoying some looong "hikes" (code for wearing out boot leather with no deer to show for it).

We're both looking forward to another big deer hunting adventure together this coming fall.  While an opportunity for my son to harvest his first buck would have been nice, spending time together in the great outdoors is the real gift.


A Father-Son Buck


My 10-year-old son, Aidan, and I traveled to Trinity County this past Friday (October 2014) for an overnight hunting trip. After setting up camp, we headed out for an evening hunt with a relatively short hike into our hunting area planned. On the way to our hunting spot, I decided to stop by a little valley where over the years I'd consistently seen a lot of deer. We spotted this little 2 x 2 forked-horn buck feeding in the open within seconds of arriving. I closed the deal with a single approximately 50 yard uphill shot.

I was thrilled to share this experience with Aidan, who was so excited "we got a buck!" After field dressing our deer, we headed back to camp where I skinned him out and we recounted the story around the campfire. 

Tuesday, June 24, 2014

Archery Fun!


I fondly remember spending many carefree hours as a boy flinging arrows around with my little red bow.  (I somewhat less affectionately also recall running for my life more than once after shooting an arrow in the air directly above me and losing sight of it in the sun!)

I recently bought my 3 oldest sons and daughter inexpensive youth recurve bows from one of our local sporting goods store.  This past Saturday Caleb and Aidan spent some time in our backyard practicing their fledgling archery skills. Dad joined in too for some friendly competition. 

A basic bow with a few practice arrows can be purchased for around $25.00.  Pick up a hay bale or two (or an archery target) and you're all set for some relatively low cost fun.

Of course younger children should be closely supervised at all times by a responsible adult when launching high speed pointy-tipped projectiles.  Be sure to have a safe target backstop and clear background because you can expect a few errant arrows.  Also, first secure your pets unless you prefer poor Fido to resemble a hairy pin cushion.        

Aidan takes aim

Caleb at full draw


Bullseye!